Screenshot annotation
Screenshots that are annotated clearly, consistently, and effectively help users to identify relevant features and actions. Use the following methods to label elements in your screenshots.
Callout boxes
To draw attention to a particular part of a screenshot, do the following
- Whenever possible, use a rectangular callout box.
- Use the Hex color
#F50057(RGB:245,0,87) for the callout box. - Don't use arrows to point out callout boxes, or use any kind of hand-drawn element such as hand-drawn circles.

Style reference
- Line width: 2 pixels
- Line color:
#F50057(RGB:245,0,87)
Labels
There are two types of label:
- Area labels: Use to indicate specific areas of a screenshot.
- Stage labels: Use to indicate particular steps or stages in a process or workflow.
To use either of these labels in your screenshots, download the alphanumeric labels in a PSD file or Snagit template. For instructions on how to import a theme into Snagit, refer to the Snagit documentation. If you want to create your own labels in another tool, refer to Style reference.
Area labels
To refer to multiple areas in a screenshot, use alphabetical labels. Be consistent in the size and placement of labels in a screenshot. Don't use lists or tables. If there is any ambiguity about which area of the interface you are referring to, use both a label and callout box.
To describe the alphabetical labels, do the following:
- Add the alphabetical labels with descriptions immediately after the image and image caption.
- Use a separate paragraph for each label.
- Use a non-bolded alphabetical label followed by a colon.
The following example shows how to use area labels to identify different areas within a screenshot:

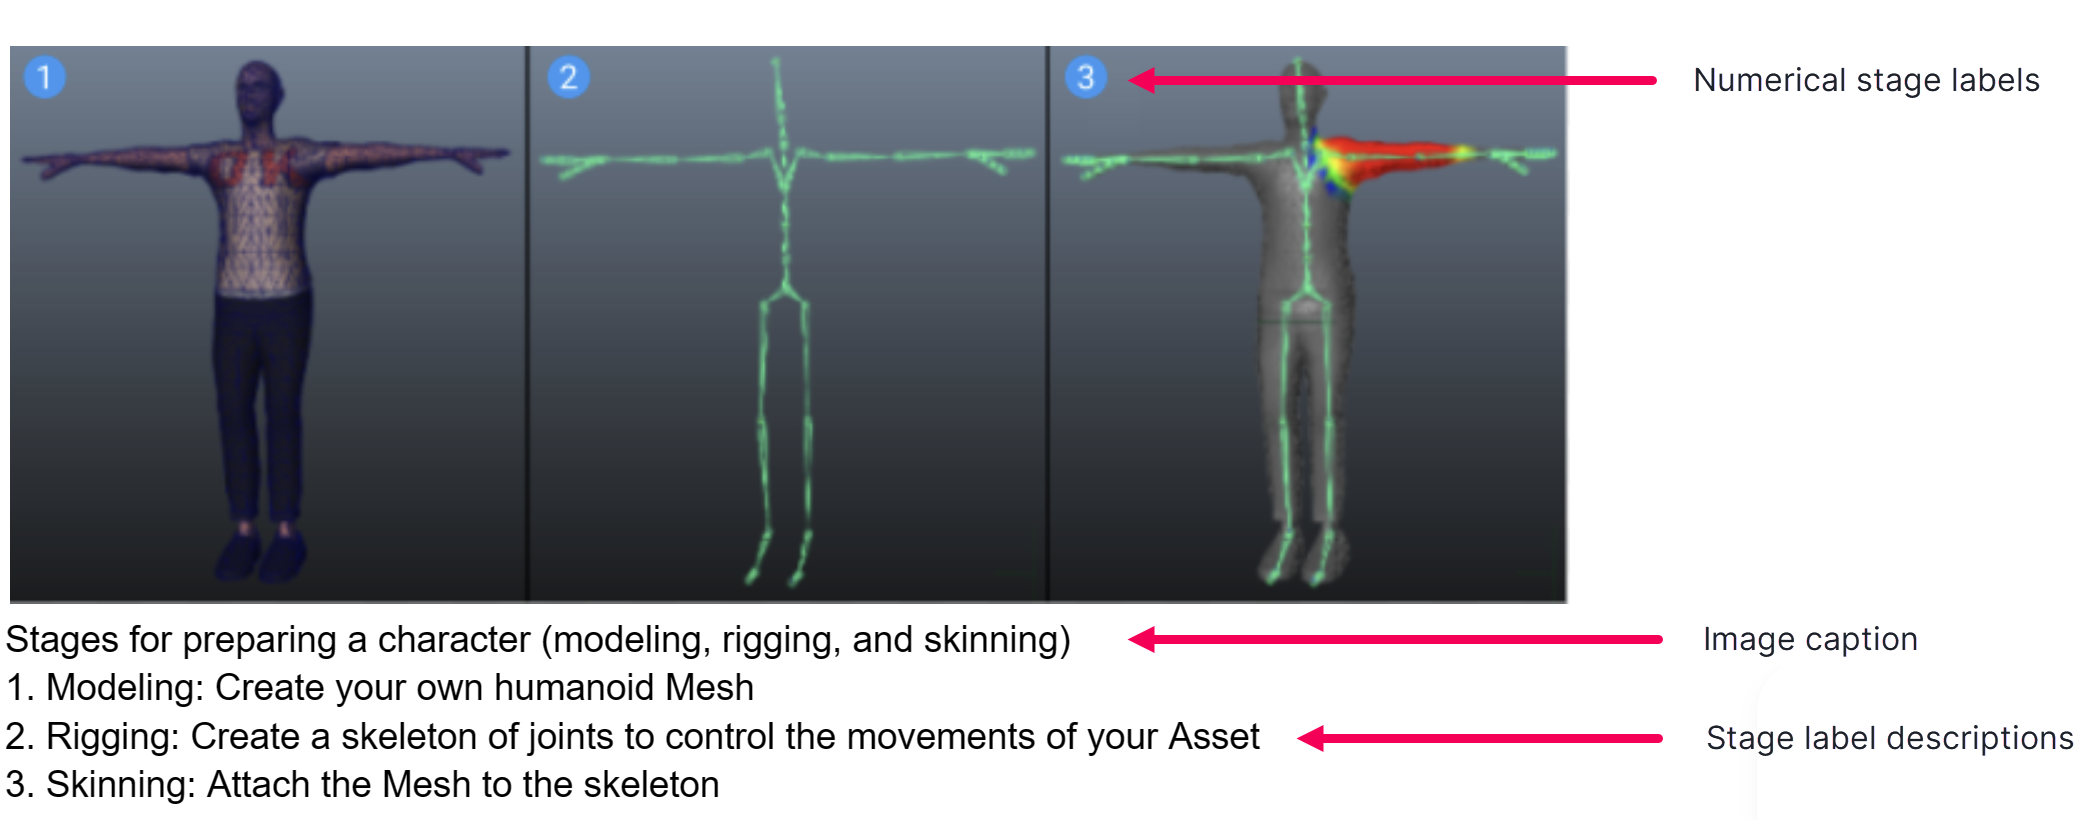
Labels for stages
If you need to demonstrate multiple steps in a task or stages of development, use numerical labels. Be consistent in the size and placement of labels in a screenshot. Don't use lists or tables. If there is any ambiguity about what you are referring to, use both a label and a callout box.
To describe the numerical labels, do the following:
- Add the numerical labels with descriptions immediately after the image and image caption.
- Place each label on a separate paragraph.
- Use a non-bolded numerical label followed by a colon.
The following example shows how to use stage labels to identify different steps in a workflow:
Style reference
Use the following guidelines to create labels for your screenshots. If you use Snagit or Photoshop, you can download the PSD file or Snagit template.
| Label element | Description |
|---|---|
| Circle size | Similar in diameter to the average text height in the image, and consistent for all labels on the image. |
| Circle color | Web Blue #2196F3 (RGB 33, 150, 243) |
| Alphanumeric character font | Inter bold, uppercase |
| Alphanumeric character font size | Any size that fits comfortably inside the circle, and consistent for all labels on the image. |
| Alphanumeric character font color | White (#FFFFFF, RGB: 255, 255, 255) |