User interactions
Use consistent terminology to refer to interactions with the user interface (UI).
Hardware interactions
Follow the guidance from the Microsoft Style Guide's Describing interactions with UI, with some exceptions. The main terminology is as follows:
- Use "select" to describe an interaction with the left mouse button. Alternatively, use "click," especially when the operation isn't a selection. For example, "click in the empty area of the window."
- Use "right-click (macOS: Ctrl+click)" to describe an interaction with the secondary mouse button.
- Use "middle-click" to describe an interaction with the middle mouse button. Remember that not all mice have middle buttons, so provide alternative controls where possible.
- Use "click and drag," "right-click and drag," or "middle-click and drag" to describe holding a button while moving the cursor, such as when drawing a box or moving a file.
- Use "press" to describe an interaction with a physical or touchscreen keyboard. For example, "press the Spacebar."
- Use "enter" instead of "type" to describe an interaction using the keyboard. Use "delete" when removing a value from a setting and leaving it blank.
- "Set (to)" is useful for settings and properties, especially when there is more than one way to do a task. Example: Set the X, Y, and Z values to 0.
If in doubt, use the terminology that your target audience is likely to understand. Remember that some users might not use conventional hardware or recognize English jargon for computer interactions, such as "hit" instead of "press" for keyboard interactions.
Keyboard shortcuts
Write key names in sentence case, in bold font. If the shortcut uses multiple keys, use a + sign in regular font. For example, "Shift" or "Ctrl+F."
When keyboard shortcuts are different between different operating systems, use the Windows shortcut, immediately followed by a set of parentheses that contains the string "macOS: " and the macOS shortcut. For example:
- To build and run your game, press Ctrl+B (macOS: Cmd+B).
- To orbit the selected GameObject, hold Alt (macOS: hold Option) and left-click inside the Scene view.
Unity Editor interactions
Where possible, use UI-neutral language to describe how to do something in the Editor. UI-neutral language reduces the maintenance needed when the UI changes.
- Avoid reference to buttons, sliders, checkboxes, dropdowns, and other UI elements.
- Avoid directional references to the location of buttons or other UI elements, such as "top," "left," and "above."
- Omit variables in references to UI text, for example, button labels that change depending on user-selected options.
You can refer to UI elements when you’re writing specifically about how to use the user interface, or writing for readers who are unfamiliar with the general Unity UI.
For more information about how to refer to specific items in the Unity Editor, refer to UI terms.
| Incorrect | Correct |
|---|---|
| To open a new project, select the New button. | To open a new project, select New. |
| Use the slider to set the volume. | Set the volume. |
| Check the Volume checkbox. | Enable Volume. |
| Open the Volume dropdown and select Low. | Set Volume to Low. |
| To access more options, select the three-dots icon in the upper-left corner of the Inspector. | To access more options, open the More (⋮) menu in the Inspector window. |
| To include the selected countries in your campaign, select Add # bids. | To include the selected countries in your campaign, select Add bids. |
Top-level program windows
Don’t refer to entire programs in UI terms. When you need to orient the user to change to a specific program, write the name of the program in regular font. Don’t use bold, and don’t refer to the type of UI element the program is presented in.
| Incorrect | Correct |
|---|---|
| In the Unity Editor window,... | In the Unity Editor,... |
| In the Unity Hub window,... | In the Unity Hub,... |
| In the Chrome window or another browser window | In Chrome or another browser,... |
Formatting Unity Editor elements
Format names of UI items (such as properties, buttons, menu items, or non-interactive tabs or section headings) in bold. Only use bold when you are specifically referring to the UI. Don't use bold when you are referring to the idea in a general sense. For more information on choosing the appropriate formatting, refer to Text formatting.
| Incorrect | Correct |
|---|---|
| In the Sprite Renderer component, adjust the Color setting. | In the Sprite Renderer component, adjust the Color setting. |
| Create an empty GameObject (menu: GameObject > Create Empty). | Create an empty GameObject (menu: GameObject > Create Empty). |
| You can attach a Box Collider component to any GameObject. | You can attach a Box Collider component to any GameObject. |
Variations in the UI
When referring to text in the UI, write the text exactly as it appears in the UI, even if it's grammatically incorrect or inconsistent with the Unity Style Guide. For example, "Select Use Game Object to use the GameObject." If possible, discuss this inconsistency with the developer to check whether they can fix the UI text.
There are two exceptions to this guideline:
- If a button label contains a variable that changes based on user actions, then omit the variable in instructions.
- If an option label ends with a colon or an ellipsis, don’t include that punctuation in instructions.
Navigation paths
When giving directions through a menu in Unity or any other program, use a single right-pointing angle bracket with a space on either side. If an option label ends with a colon or an ellipsis, don’t include that punctuation in instructions. Format only the option labels in bold, not the right-pointing angle bracket.
When navigation paths are different between different operating systems, use the Windows navigation path, immediately followed by a set of parentheses that contains the string "macOS: " and the macOS path. For example:
| Incorrect | Correct |
|---|---|
| In the main menu, go to File and then select Build Settings. | In the main menu, go to File > Build Settings. |
| To open a project, go to File > Open. | To open a project, go to File > Open (macOS: Unity > Open) |
Non-interactive tabs and section headings
Non-interactive tabs or section headings help to organize settings and properties into logical groups. Users can’t interact with these tabs or section headings (expand, collapse, or select).
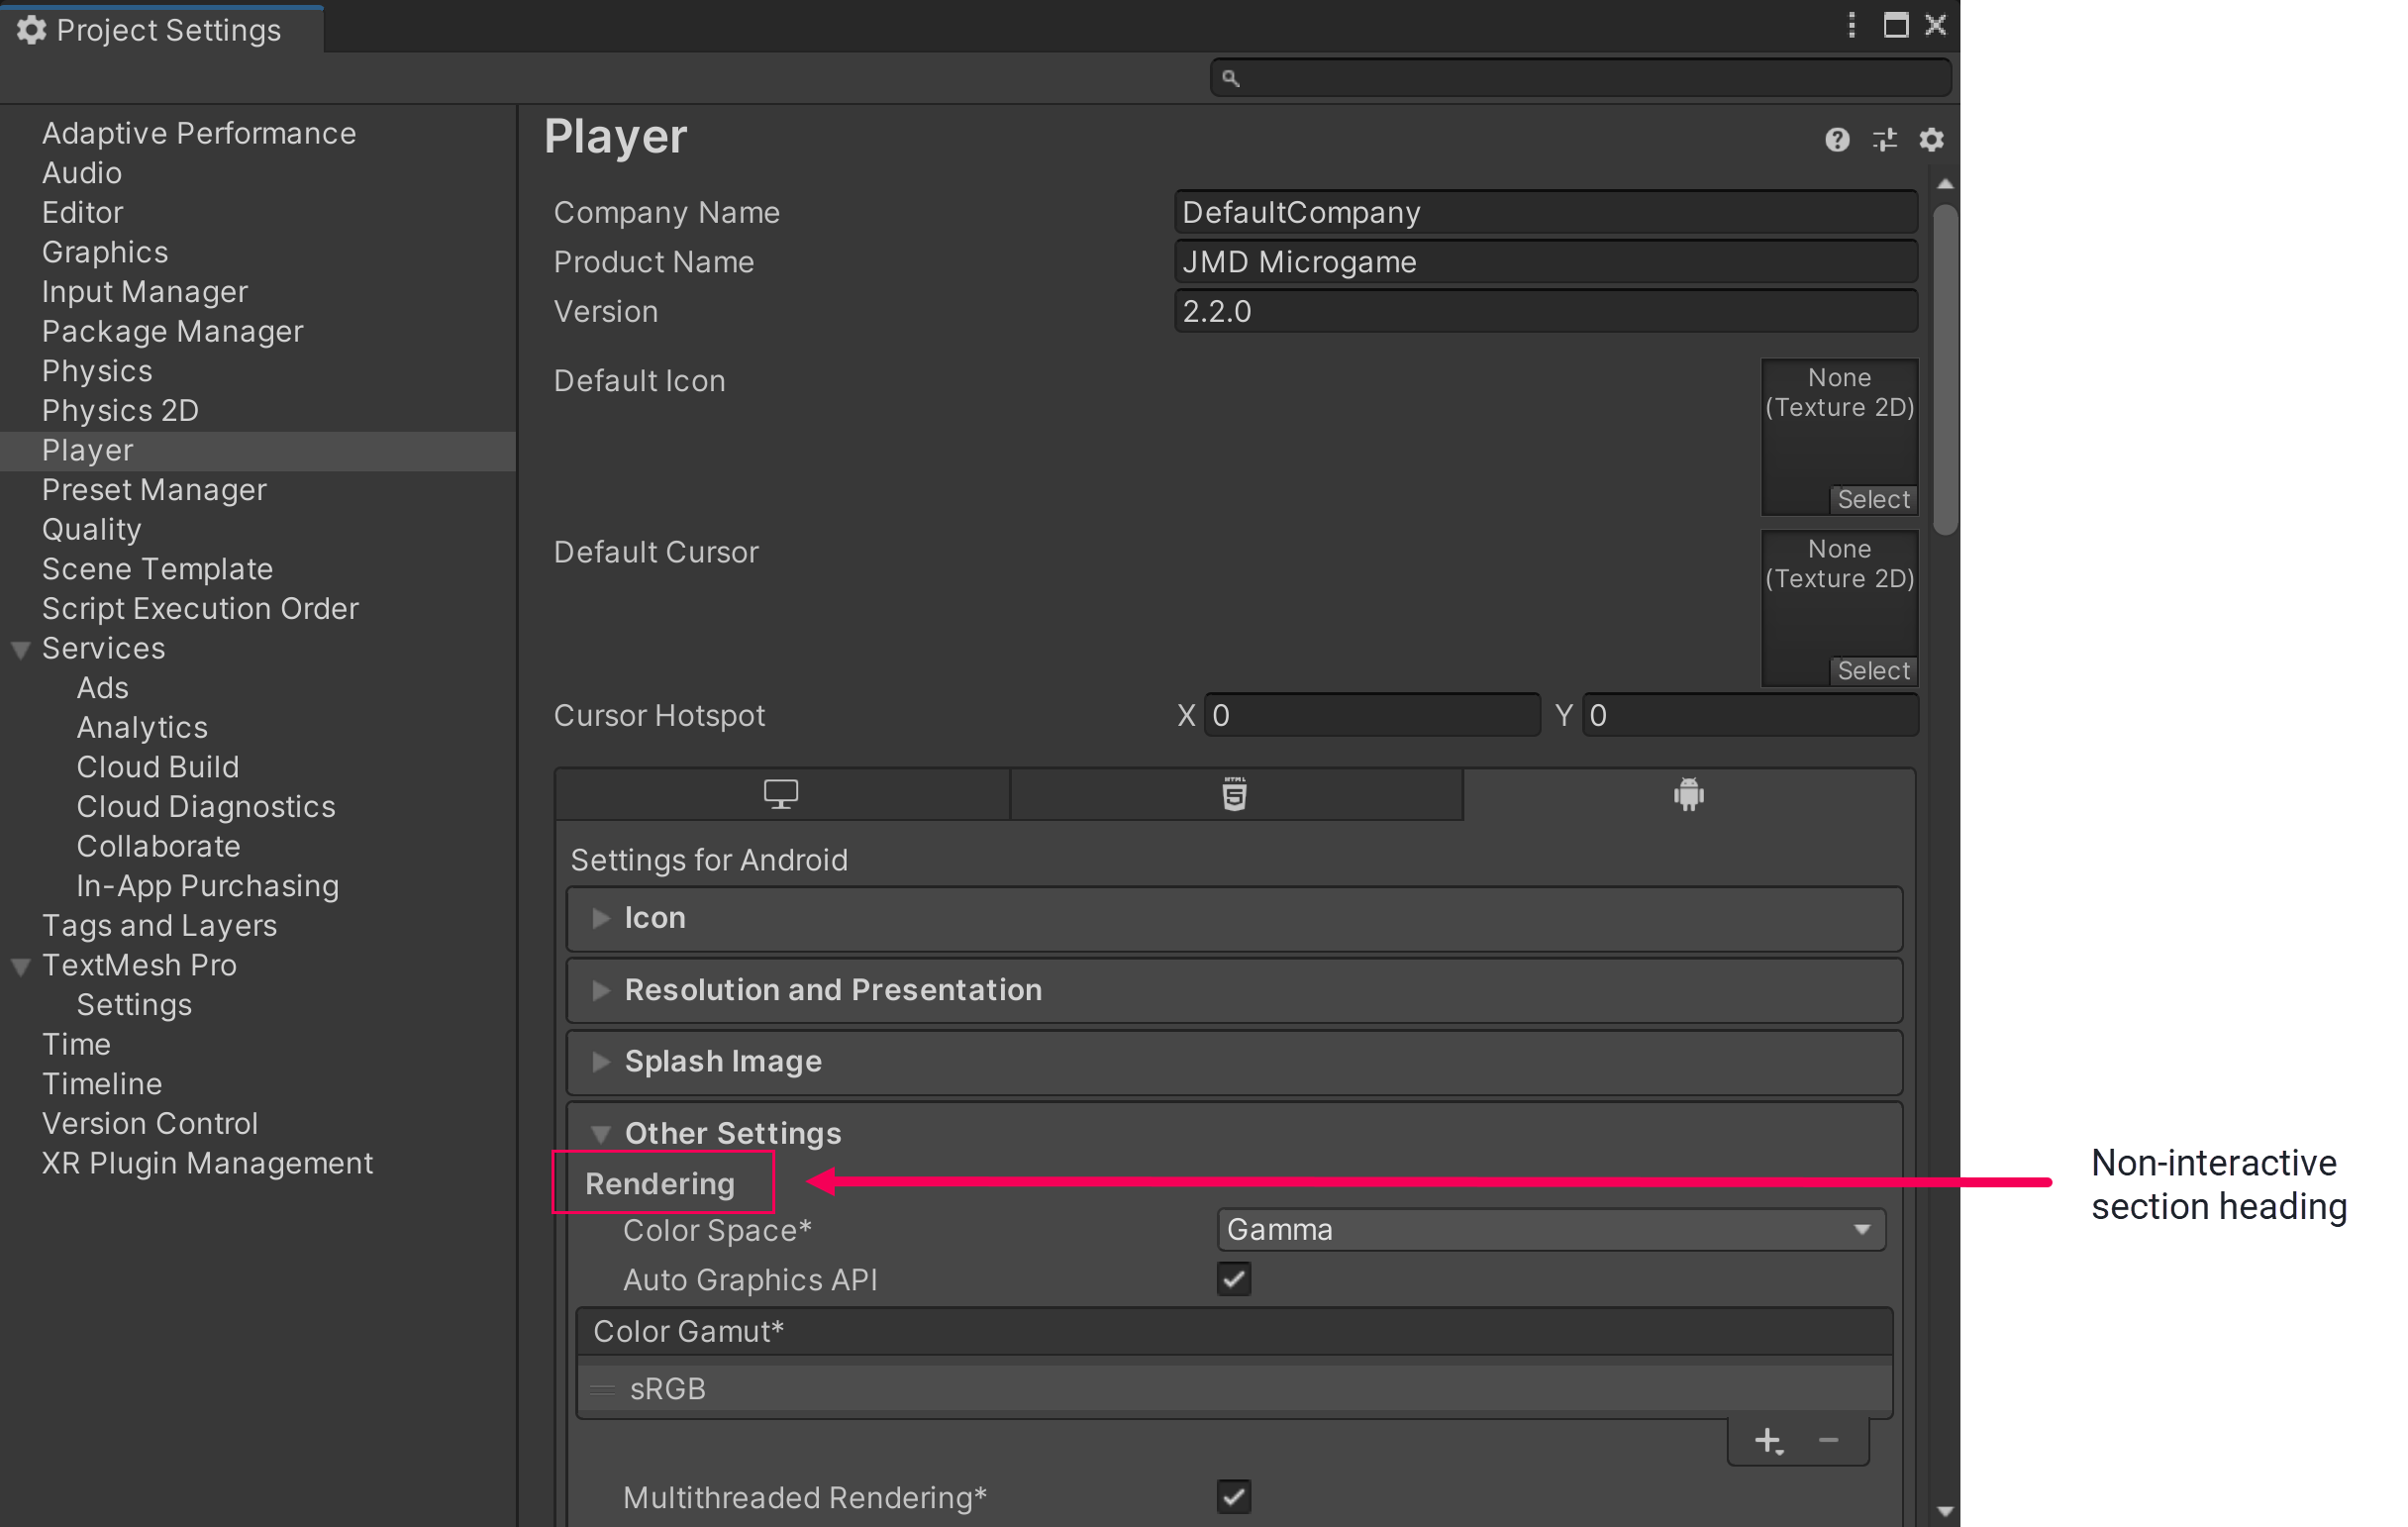
Don't include non-interactive tabs or section headings in navigation paths. Instead, orient the user in the tab or section at the start of the sentence. If the non-interactive tab or section heading appears partway through the navigation, then end the navigation path and begin a new sentence.
| Incorrect | Correct |
|---|---|
| Go to Edit > Project Settings > Player > Other Settings > Rendering and set Color Space to Linear. | Go to Edit > Project Settings > Player > Other Settings. In the Rendering section, set Color Space to Linear. |
| In the Nav Mesh Agent component, go to the Obstacle Avoidance section and set Quality to High Quality. | In the Nav Mesh Agent component, under Obstacle Avoidance, set Quality to High Quality. |
| To create GameObjects at the origin of your scene, go to Edit > Preferences > Scene View > General and activate Create objects at origin. | To create GameObjects at the origin of your scene, go to Edit > Preferences > Scene View. In the General section, activate Create objects at origin. |